So December 1st, last month in 2010, 25 days till Christmas...here it goes!
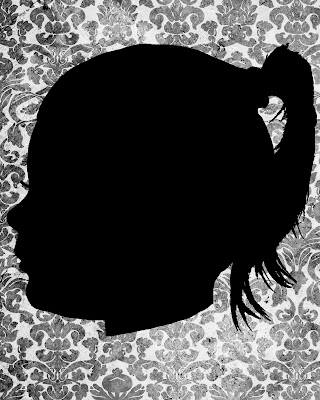
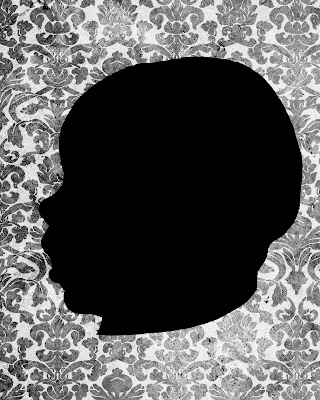
Today I made cameos of the girls...I decided I want to do the entry way in a black and white vintage looking damask. I have always loved this look but had NO idea where to put it, so the entry way sounds like a great place to start. It is kind of bold, therefore I didn't want it all over the house, but I am excited to take on yet another project.
I have a long wooden shelf I found at the habitat for humanity store (pics to come) that I plan to redo. I finished painting the frames black (they were ugly plain wood) with a matte spray paint to put in those house pictures I took, and I have plans to refinish the old walmart special bookshelf down stairs.
Here is what I made, I plan on putting these in frames and setting them on that shelf OR, hang them with ribbon....I haven't decided yet. I will try them both out and see which I like best.
So, without further rambling, here is what I made...


Adorable right?? You are thinking...I need one of those of my kids right?? Well, maybe not...but if you are...it is super easy, and here is what you need and how to do it.
1-cute kids (or anything really, try a vase with a single rose...ooooh I just gave myself an idea....)
2-a contrasting background (I used the black side of my reflector)
3-a camera...point and shoot, dslr, whatever...just something that can take a pic, I used flash to freeze the subject and make nice sharp clean lines.
4-some sort of editing software, I use Photo Shop CS5, but you can use anything that allows you to manipulate the photo. Even free programs can do this!
Ok, so step one...have your subject sit and take a good shot of their profiles..., here is what I got, doesnt have to be pretty, and if you can see the look on my daughter's face....she wasn't thrilled of the idea of mommy taking another picture!
Thankfully my little sweet sweets cooperated better than her older sister. She still smiles when mommy has the camera.
Step 1-
Open the picture in your photo editing software, now again, I am doing this in CS5, if you have earlier versions of CS, it should look similar, I haven't used Elements, but may be similar to that too...anything else, just look for the equivalent in your program.
Open pic
Convert your image to black and white, if you have color sliders that pop up, make your reds go to the right, that will make the skin of the subject go even lighter, if you dont, shouldn't be a big deal.
Step 2-Now go to the level sliders and make the shadow (far left) triangle go right, and the highlight slider (far right) go left till you get something similar to this.
Step 3-I merged the layers, but you just need to make sure you now select the background layer and clean up anything that needs cleaning. As you can see, her eye is still dark. I grabbed a brush in white and "painted" over to make her head solid white. You can clean up any edge lines at this time to make it the way you want.
{1. ensure the right layer is selected. 2. Select the white color 3. Select your pain brush 4. Paint on subject}Step 4-(1) Ensure your background layer is selected if you have more than one layer open.
(2) Select your brush (should be already selected) and change your color to black (the background color).
(3) Create the neck part where you want it cut off, using a hard round brush and fill in the rest of the black, leaving just the head of your subject.
Step 5-Go to your magic selector tool (or laso, or whatever will select the whole head), click on your subject and you should get the "marching ants" around your subject completely.
Step 6-RIGHT CLICK your head and click copy ( you can select cut, but I like having a whole background as well as the separate cut out).
Step 7-Select the layer that you just made and make the others invisible. Double click that layer and a menu pops up, select COLOR OVERLAY, that will pop up another window, choose the color you want your head to be, in my case, I made it black.
Step 8-Now you can open a paper background of your choice and place the head on top and you get your beautiful cameo!
**Make sure if you are going to print it, you make your background paper document, the size you want to print. I made mine an 8x10, then placed the head on it, and resized accordingly.
I hope I didn't confuse anyone and you are able to follow this tutorial to make your own!
This would look sweet in your little girls room in a frame hung up by ribbon, you can do this as a family and put on the wall, you can use inanimate objects like fruit, candle sticks, or anything and create beautiful wall decor! You can print just the shape you made on the printer, cut it out, trace it on canvas and paint to have even more personalized artwork! The possibilities are endless (and I just gave myself more ideas and MORE projects haha).
If you make anything and blog it, I'd love to see!


1 comment:
Cute cameos of your darlings, good job Melissa! Had I used a black/plain background, it would have made it easier for me to extract the silhouettes I used to make my own projects. Oh well: labor of love and all that...! I'll use your tut the next time around,thanks. :)
Post a Comment